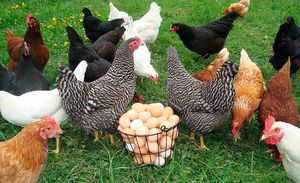
Many homeowners and gardeners consider acquiring chickens to ensure they always have fresh eggs on the table. However, for hens to lay eggs, they need to be provided with optimal conditions by building and equipping a chicken coop. Some potential farmers mistakenly believe that building a chicken coop is time-consuming and expensive.
This is a misconception. Properly planning the workflow and building a poultry house yourself will save both time and money.
Content
Choosing a location for a chicken coop
The ideal place for a poultry house would be sheltered from the rain.A partially shaded area. It's best to locate it near dense bushes, which will provide shelter from wind and rain. Furthermore, the bushes harbor a variety of insects, which the chickens will happily seek out and eat.
It is recommended to place a bird house in the far part of the yard, where people and animals rarely go. This is because some breeds of chickens are afraid of strangers, become stressed by their presence, and stop laying eggs.
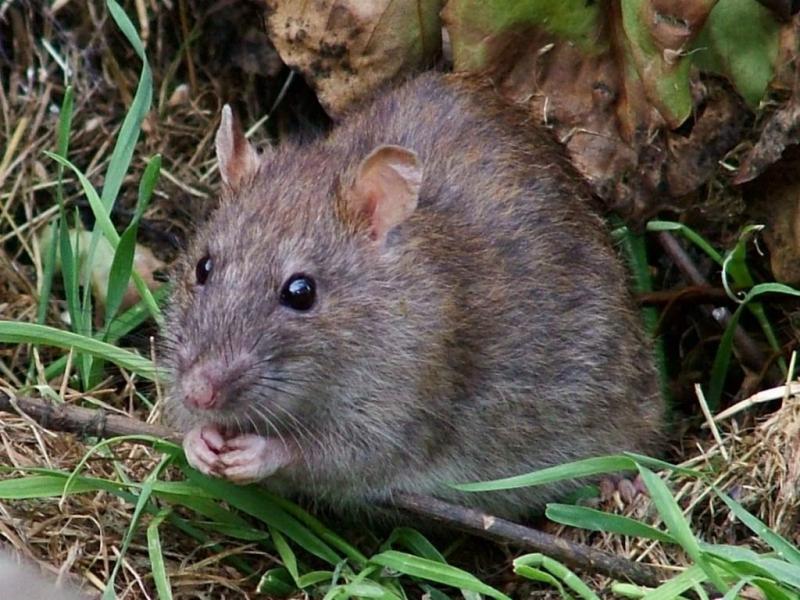
 A chicken coop is a must must be located on a hillTo keep rats and foxes out. For additional protection, DIY construction should be done using 19 mm thick timber.
It's best to locate the coop on the west or east side. Its windows should face south, as sunlight has a positive effect on egg production.
The area for the chicken coop must be dry. Water should not accumulate on it., so it's best to place it on a raised platform. A trench or ditch for rainwater runoff must be dug around the fence. If there's no such elevated surface in the yard, one must be created artificially. To do this, first pile up broken brick or stone, crushed stone, or gravel. Then, add a layer of clay mixed with broken glass to protect the hens from rodents. A layer of sand at least 15 cm thick is placed on top of the resulting mound, and the foundation is built.
Chicken coop layout - photos
 The area of the poultry house directly depends on the number of chickens, which will live in it. Its size should allow the birds to move around freely. The minimum size of the house should be at least 3 square meters. It is suitable for 2-3 hens. If there are more birds, the area of the coop is determined at a rate of 1 square meter per two or three hens.
It's essential to create a wire-fenced run around the coop. It should be at least two square meters in size per hen. Therefore, for ten laying hens, the run should be at least 2 x 10 meters.
Organizing a courtyard It is imperative to make a canopy over it, which can be partial. Under it, the hens can hide from the rain or the scorching sun.
Construction of the foundation and floor
Building a chicken coop yourself you should start by pouring the foundationIf a winter poultry house is being built, it must be a warm structure, which will require considerable investment. Therefore, it should not be left idle year-round. The foundation must be able to withstand the load from the roof and exterior walls, so it is built according to the following recommendations:
 The foundation must be deep.
- The thickness should be equal to the thickness of the walls.
- To make the foundation, a trench is dug around the poultry house.
- Wooden formwork, which is then filled with concrete, is installed 10 cm into the ground.
- For strength, the foundation is covered with burlap on top.
 The foundation must be deep.
For a summer chicken coop it will be a foundation 10 cm wide and 30 cm deep is sufficientYou can also avoid a foundation altogether, making the coop quite inexpensive. In this case, the house structure should be lightweight. The coop can be built from wooden planks. In this case, the wooden structure will be in contact with the ground, significantly reducing its lifespan.
The floor of both summer and winter chicken coops must be protected. It should not be left dirt, as it can easily allow rodents and predators to enter the coop.
To install the floor yourself a hole is dug by hand to a depth of 20 cmThe bottom of the pit is filled with 5-10 cm of crushed stone and then filled with cement mortar. A lightweight floor can be made from fine-mesh galvanized mesh. The mesh should be covered with sand and then filled with cement.


Sand, peat-mixed straw, chopped straw, or sawdust can be used as floor litter. As soon as an unpleasant odor appears in the coop, indicating soiled floors, the litter should be replaced.
Construction of walls
Build walls You can build a chicken coop yourself using stone, brick, cinder block, timber, or wood. It all depends on your budget and the purpose of the house.
For a summer poultry house the walls can be made from planks, which should be at least 20 mm thick. A winter chicken coop is best built from more durable materials. To ensure easy access to the birds, the walls should be at least 190 cm high.
Sequence of construction of walls from timber:
- An insulating material, such as roofing felt, is laid on the foundation. This is necessary to prevent rotting of the wooden walls and to provide waterproofing.
- At the second stage, the crown of the timber is laid, the ends of which are connected in half.
- On the first crown, 100x150 mm beams (joists) are laid every 50 cm. The space between them is filled with fiberglass or other insulation.
- All other crowns are placed on top of the first and fastened “tongue and groove”.
- Before erecting each crown, it's recommended to place insulation between the beams to retain heat in the winter. Flax-jute fabric can be used for this purpose.
- The beams are secured together using wooden dowels. These are driven into pre-drilled holes in the beams. The dowel should pass through the top beam and into the bottom one.
- The depth of the dowel should be equal to two and a half beams. The distance between the rods should be between one and one and a half meters.
- The dowel must be driven into the beam 3–4 cm deep. Otherwise, after the poultry house settles, the wooden rod may hit the top beam and lift it.
 All other crowns are placed on top of the first and fastened “tongue and groove”.
Ventilation grilles must be installed in the walls, located at different ends of the chicken coop.
Roof construction
With your own hands It is best to make a gable roof for a poultry houseIt is made of lathing and rafters. This roofing form has several advantages:
- Reduces the cost of heating the house in winter.
- Protects chickens from hypothermia and overheating.
- Snow and moisture do not linger on it.
- In the attic space formed between the ceiling and the roof, you can store equipment, food, tools, and bedding.
 Reduces the cost of heating the house in winter.
For the construction of the roof It is necessary to attach rafters to the walls, the angle of which relative to the walls should be 35–50 degrees. A ceiling is constructed on top of the plank walls, covered with insulation and sheathed with chipboard. Roofing material, such as slate, is laid on top of the rafters.
The internal structure of the poultry house
Arrangement of the inside of the chicken coop provides the room with good lighting, installation of feeders, drinking bowls, perches and nests for birds.
Windows and artificial lighting
In low light conditions the laying hens move little, become lethargic and lay eggs poorly. The total window area should be at least 1/12 of the room's floor area. Most windows should face south. They should be easy to open and equipped with mesh to prevent predators from entering.
Daylight hours for chickens Laying hens should have at least 15-17 hours of light. Therefore, in the fall and winter, they need to be provided with artificial lighting. Lamps with shades can be used for this. The required power is 5 watts per square meter of the room. Most of the lighting should be above the perches, waterers, and feeders. Nests should be shaded.
Chicken feeders
Feeders are possible buy or make it yourselfIn any case, they must meet the following requirements:
- For wet food, metal or plastic feeders are installed.
- You can make a long wooden feeder for dry food, mineral supplements, shells, and small stones. Its dimensions should be 10 x 10 x 80 cm.
- For green grass, thin wire markers may be useful.
 For wet food, metal or plastic feeders are installed.
Making perches
As perches long poles are used in the chicken coop, the diameter of which should be 4–6 cm. For standard chicken breeds, they are placed at a height of 1.2 meters from the floor, and for large breeds, about 0.7 meters. All perches should be located near the wall opposite the entrance.
To prevent birds from interfering with each other, each hen should have 20 cm of space. The distance between the bars should be at least 35 cm.
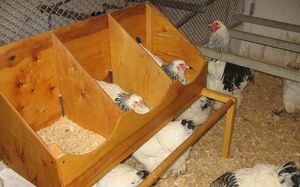
Laying nests
 Nests for chickens tothey are roosting in the farthest corner of the poultry house on a load-bearing wallOne nest is designed for five hens. Wooden boxes 30 cm deep and wide, and 35 cm high can be used as nests. The nest should have a wide entrance measuring 25 cm and a height of the same size. The entrance should have a 5 cm threshold, in front of which a perch is nailed for takeoff.
Nests must be equipped with a roof with a 45 degree slopeBirds won't sit on such a roof and soil it with their droppings. It's best to place all nests in a single block, 40 cm above the floor.
The nest floor is lined with hay or straw. It's recommended to place an egg or egg-shaped decoy inside to attract the birds. Hens lay much more eggs in such nests.
Summer chicken coop photo
For those who will keep chickens only in the summer, You can quickly build it yourself A lightweight, small summer poultry house. It's primarily used for grazing hens during warmer months, so it can be designed as an enclosed pen. This allows the birds to roam freely without being able to access the garden or vegetable patch. This type of pen can be attached to an outbuilding, significantly saving space on the property.
Bird population
Preparing a chicken coop for habitation involves cleaning and disinfection of the premisesThe poultry house should be washed with a 2% solution of hot soda ash (200 g per bucket of water). A 2–5% solution of creolin, diluted in the same proportions, can also be used.
After disinfection, fill the nests with pine shavings or straw, add water to the water bowls, and fill the feeders with feed. After this, the hens can be moved in.
As you can see from the article, if you want it, it’s not that difficult build a chicken coop with your own handsFor construction novices, to create a reliable laying house, simply follow the construction steps precisely. A well-built chicken coop will serve its owner for many years without any repairs.