Country property owners who keep large dogs to guard their homes should definitely consider installing a dog run in the yard. Such a structure is a good idea even if the four-legged friend is well-trained and well-behaved. After all, even a friendly dog (such as a husky or a Labrador), obeying instinct, will sometimes try to keep strangers, construction workers, or utility workers out of the yard.
Of course, you can do it for your pet. purchase a ready-made enclosureHowever, such structures are quite expensive. Therefore, many homeowners prefer to build these dog enclosures themselves. Not only will this be less expensive, but its design and layout will likely be better suited for both the dog and the specific yard.
Content
How to choose a location for an enclosure
Before you begin building such a dog house, you'll need to decide exactly where it will be located in your yard. When choosing a location for building such a structure yourself, it's worth take into account the following factors:
 There should be no outbuildings near the structure. The enclosure should be constructed away from sheds, poultry houses, rabbit hutches, cesspools, etc.
- Of course, the enclosure should be built in such a way that water does not flow into it in the spring.
- It is desirable that at night the interior space of the structure be at least partially illuminated (for example, by a lantern standing in the yard).
 There should be no outbuildings near the structure. The enclosure should be constructed away from sheds, poultry houses, rabbit hutches, cesspools, etc.
Features of the building's design
When developing drawings the enclosure itself should take into account the following:
- the barrier height should not be less than 2.5 m;
- there should be enough space inside it to install the booth;
- The side from which the wind blows most often in a given area is usually made blind.
The final design of this structure can be seen in the drawings and photos provided on this page. Dog enclosures, therefore, must have a well-thought-out layout.
What should be the dimensions of the enclosure?
When choosing the dimensions of this structure, you need to be guided first of all by the size of the dog itself, or more precisely, its height at the withers. So, for pets:
- from 45 to 50 cm (shar pei, schnauzer) a 6 m2 enclosure is suitable;
- from 51 to 65 cm (Airedale Terrier, Labrador) - 8 m2;
- from 66 cm (husky, Caucasian shepherd) - 10 m2.
Of course, if the dog is a purebred and female, it's best to make the enclosure larger, to accommodate future puppies. However, if you plan to keep your four-legged friend inside only during the day and let her out into the yard at night to guard the house, a smaller enclosure can be chosen.
What materials will be needed?
Dog kennels can be constructed from a variety of materials, including brick and foam concrete blocks. However, the easiest way is, of course, to build a wooden dog house yourself. In this case, you'll need to assemble the kennel. prepare the following materials:
- timber 100*100 mm and 50*50 mm;
- boards with a thickness of 2.5 mm;
- plywood 10-12 mm;
- chain-link fencing;
- roofing felt, slate or any other roofing material;
- cement and sand.
It is worth buying painted chain-link fencing.Ordinary steel will rust very quickly in outdoor conditions.
In addition to the materials themselves, you will also need tools such as:
- hammer and screwdriver;
- building level;
- roulette;
- hacksaw or electric saw;
- shovel, buckets, concrete mixer.
The procedure for assembling the enclosure
A simple wooden dog run is being assembled. in several stages:
- fencing posts are being installed;
- The floor joists are attached to them;
- the floor is covered with boards;
- the booth is knocked down and installed in the chosen location;
- beams are being installed under the canopy;
- the enclosure is covered with wire mesh;
- The canopy is mounted, waterproofed and covered with the selected roofing material.
 fencing posts are being installed;
Installation of racks and floor assembly
The holes for the enclosure fence posts should be approximately 70 cm deep. Before installation, the lower portion of the beams (the part that will be below ground) should be treated with bitumen or drying oil. The posts should be leveled vertically and filled with compacted crushed stone or concrete.
The timber should be placed along the perimeter of the future enclosure in increments of 1.5-2 mOnce the posts are installed, the ground inside the structure should be covered with roofing felt. Alternatively, you can pour a 3-5 cm thick concrete screed into the enclosure. Joists should be installed on the resulting foundation. The easiest way to attach them to the posts is with galvanized angle brackets. The boards are attached to the joists in the usual manner. It's advisable to have a slight slope on the floor to prevent water from pooling in the enclosure during rain.
Sometimes, kennels don't have floors at all. In this case, a small blind area will need to be created around the fence after the enclosure is assembled. This can be as simple as a meter-wide chain-link fence buried in the ground. This addition is necessary to prevent the dog from digging under the fence later.
How to make a doghouse
 The dog house can be placed either inside the enclosure itself or outside it (with an exit to the inside). The dimensions of this structure are the same as those of the enclosure itself. choose based on the size of the dogFor example, a German Shepherd or Rottweiler would require a kennel measuring 750 x 1200 x 800 mm. Larger dogs, such as Alabai or Huskies, typically require kennels measuring 1100 x 1400 x 1000 mm, while smaller dogs require kennels measuring 600 x 700 x 550 mm.
Assembly of the kennel begins with the bottom. If the structure is located outside the enclosure, its floor will need to be doubled on joists to raise it to the level of the enclosure floor. Next, the frame of the kennel itself is assembled above the bottom using 50x50 mm lumber. Once it is complete, four rafters are installed on the top frame. The roof of the kennel is then covered with the chosen roofing material. covered with boards or plywood The walls of the kennel, leaving an entrance for the dog. The entrance should be large enough for my four-legged friend to easily enter. It's also important not to make the entrance too large, otherwise the dog will get cold in the winter.
It's advisable to insulate the walls and roof of the kennel with mineral wool or expanded polystyrene. Place a mat on the bottom, and cover the door with a thick, hinged piece of fabric.
How to build a canopy
The foundation for the enclosure canopy is assembled using roughly the same principles as the rafter system for a simple pitched roof. That is, the frame posts are tied around the perimeter with timber and the beams are secured. Next, another thick timber is nailed to the tie on one side. Then the rafters are installed and the sheathing is installed. stretch the waterproofing film and cover the roof with roofing material. The result is a pitched roof that will drain rainwater.
A small enclosure can be completely covered with such a roof. A larger one is usually covered partially with a canopy. In this case, when choosing the slope of the rafters, ensure that rainwater will drain away from the enclosure.
How to cover an enclosure with wire mesh
 The chain-link fencing can be secured to the fence posts with wire or regular nails (bent into a loop). The plywood of the blank wall is secured to the timber with screws or regular wood screws. Of course, a gate should also be installed in the enclosure. A frame made of 50x50 mm timber is built for it, the chain-link fencing is nailed onto it, and it is attached to the posts with hinges. The enclosure door should only close inward. At the final stage, it should be hang a strong hook.
If the booth is located outside the enclosure, it should be installed close to the floor and the wire mesh should be secured along the contour of the front wall with slats.
The final stage of assembly
So, we've figured out how to build a dog run with your own hands. Using the technology described above, it's easy to assemble a comfortable home for both a large four-legged friend, such as a husky, and a small one, such as a Shar Pei, Spitz, etc. However, you can, of course, only move your pet inside this structure after it's been properly equipped. First of all, the dog run should be equip with a feederIt's preferable for it to be automatic. With such a design, the dog can be left alone even for several days. For example, if the owners decide to go on a weekend trip to the countryside.
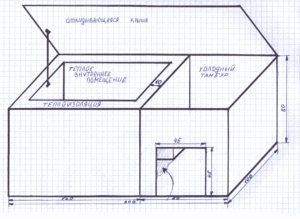
You can also make an automatic feeder yourself. The only materials you'll need are a large plastic bottle (5-liter capacity). Simply cut off the bottom. Then, turn the bottle upside down over the bowl and secure it to a frame post or a blank wall of the enclosure.
Of course, the enclosure should also be equipped with a waterer. It can also be made automatic, using the same principle as the feeder. But in this case, take a smaller bottle, and choose a bowl with very high sides.
A dog run in a city apartment
 Of course, city dwellers can acquire a dog or small puppy not only to guard their home but also simply as a pet. After all, many people would love to have a loving, loyal companion by their side. However, unfortunately, allowing a dog to run unchecked around the apartment isn't always an option. Therefore, it's also advisable to install a dog run in a city apartment. Building one in this case is quite simple, as a dog run designed for an apartment doesn't require a kennel. All that's required to assemble such a structure is to knock together a rectangular frame from lumber and carefully cover it with wire mesh on all four sides.